Keycloak
Keycloak Configuration
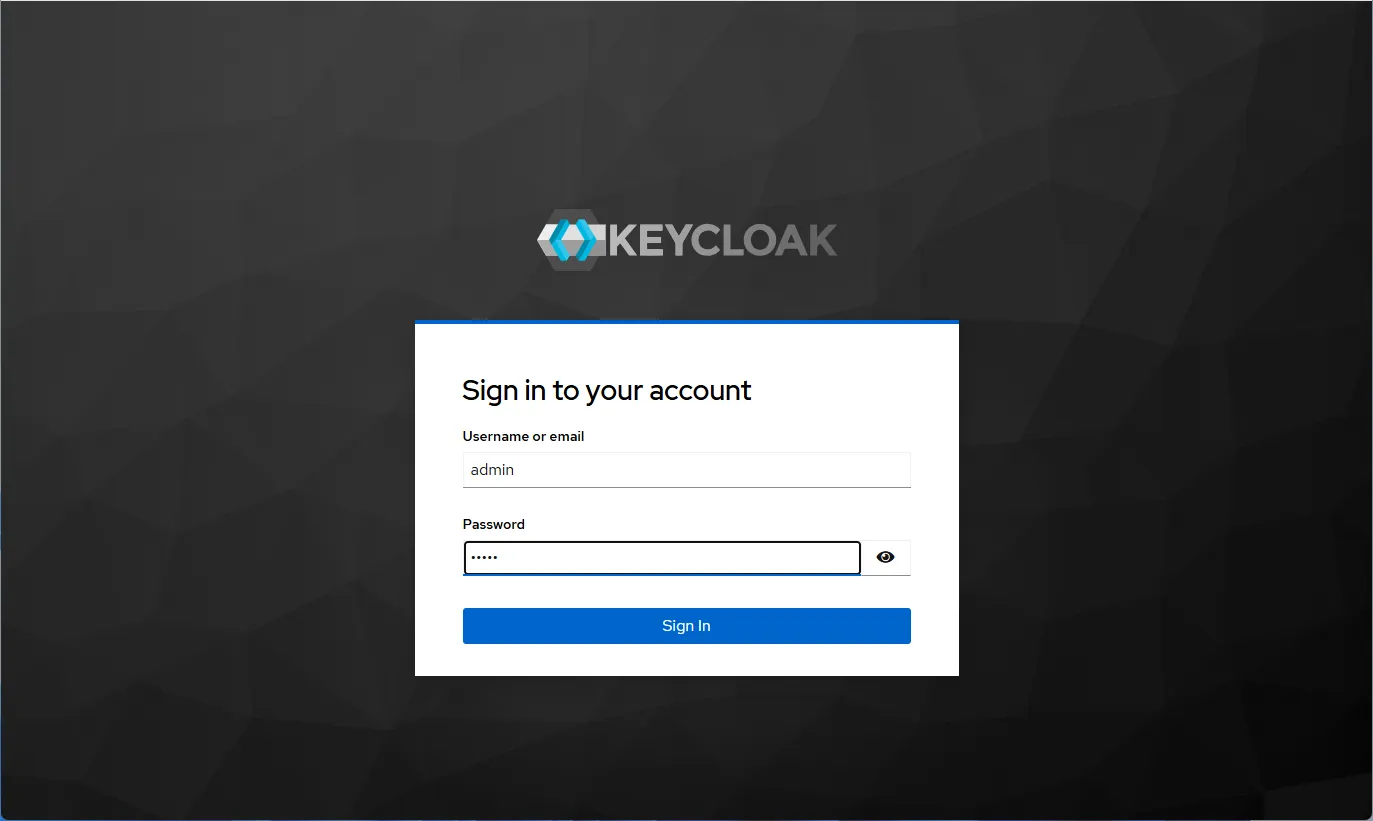
Section titled “Keycloak Configuration”- Open the page at http://localhost:8880/ (or another address specified in the environment variables).
- Enter the login and password from the environment settings.
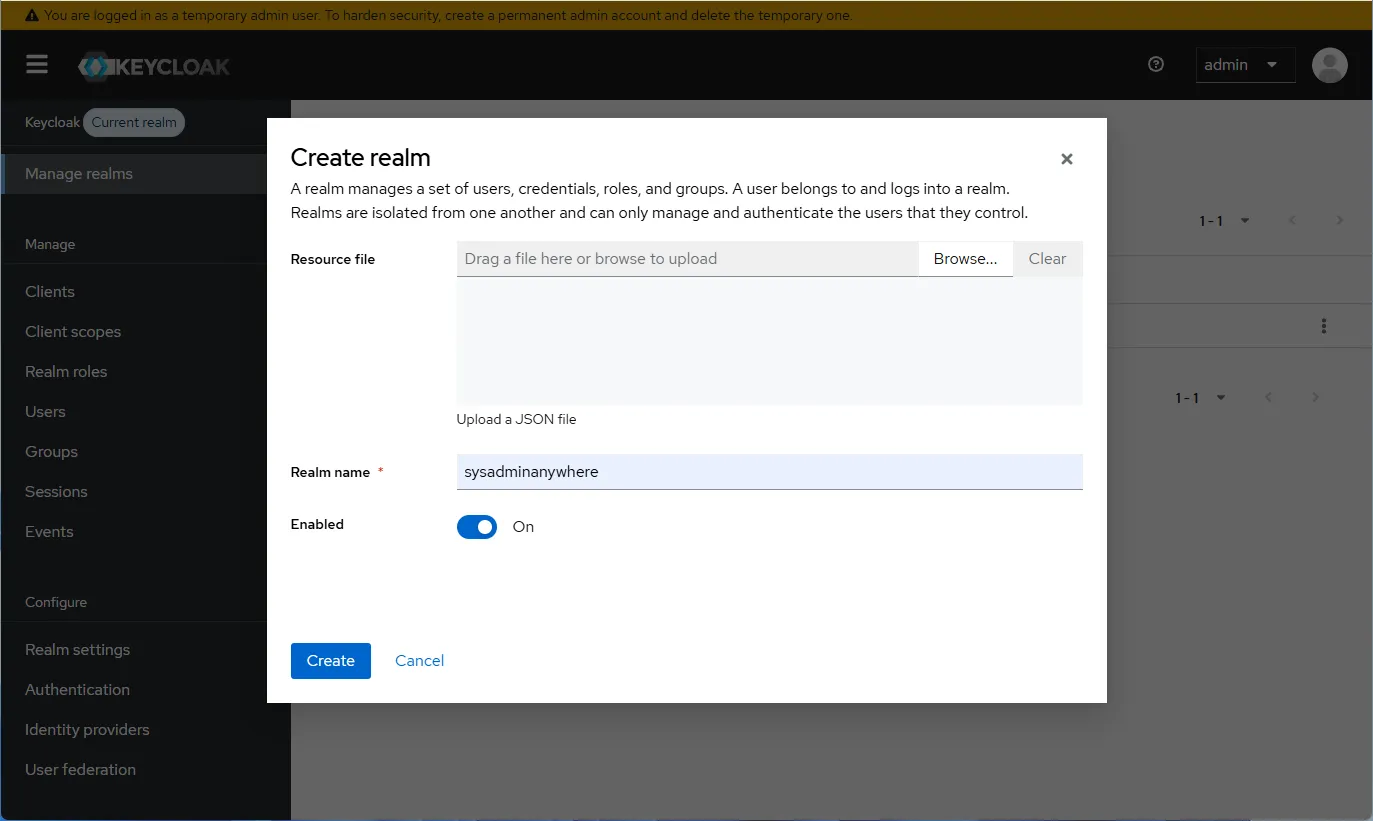
- Select “Manage realms” and click on “Create realm”.
- In the opened window, enter the “Realm name”, for example, “sysadminanywhere”.
- Click “Create”.
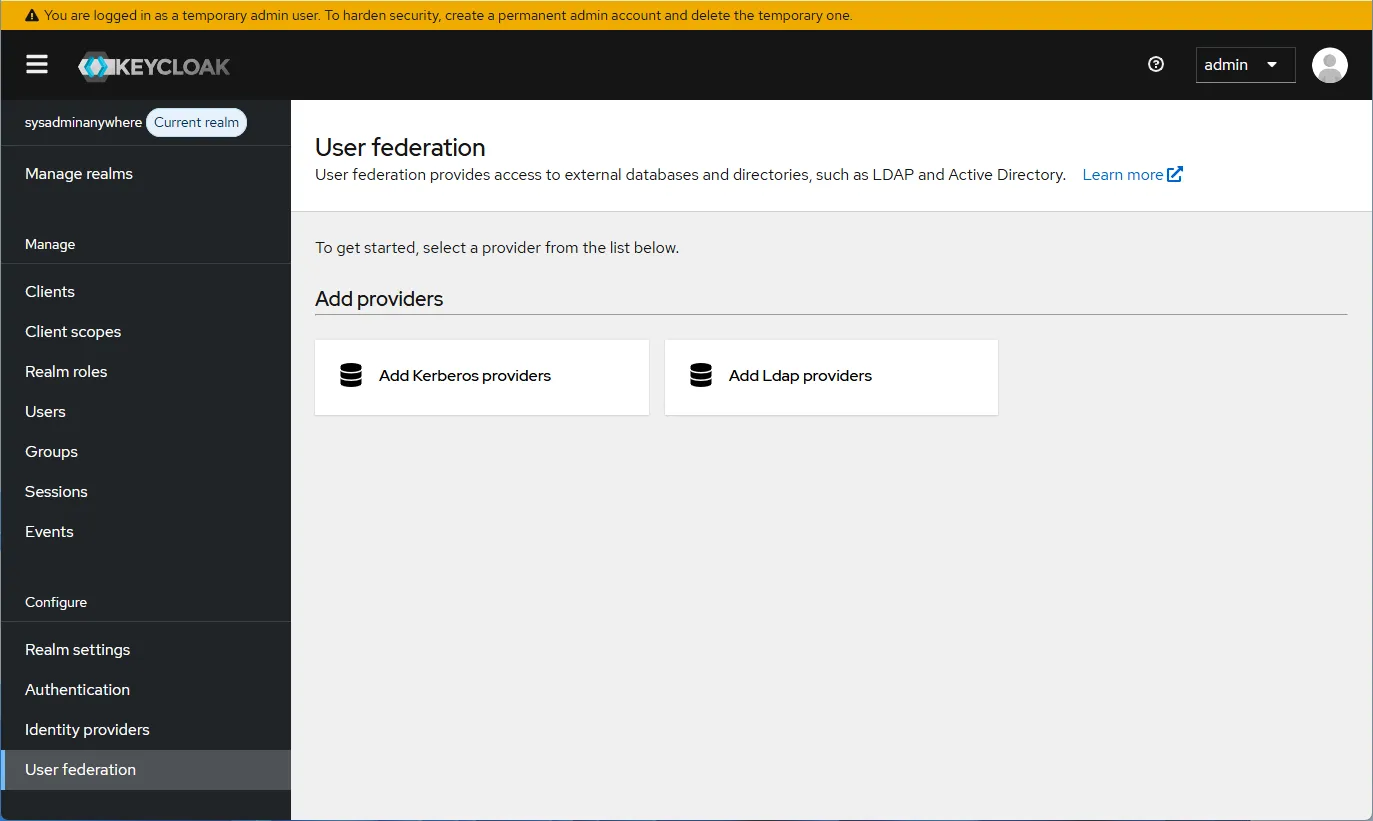
- Select “User federation” and then “Add LDAP provider”.
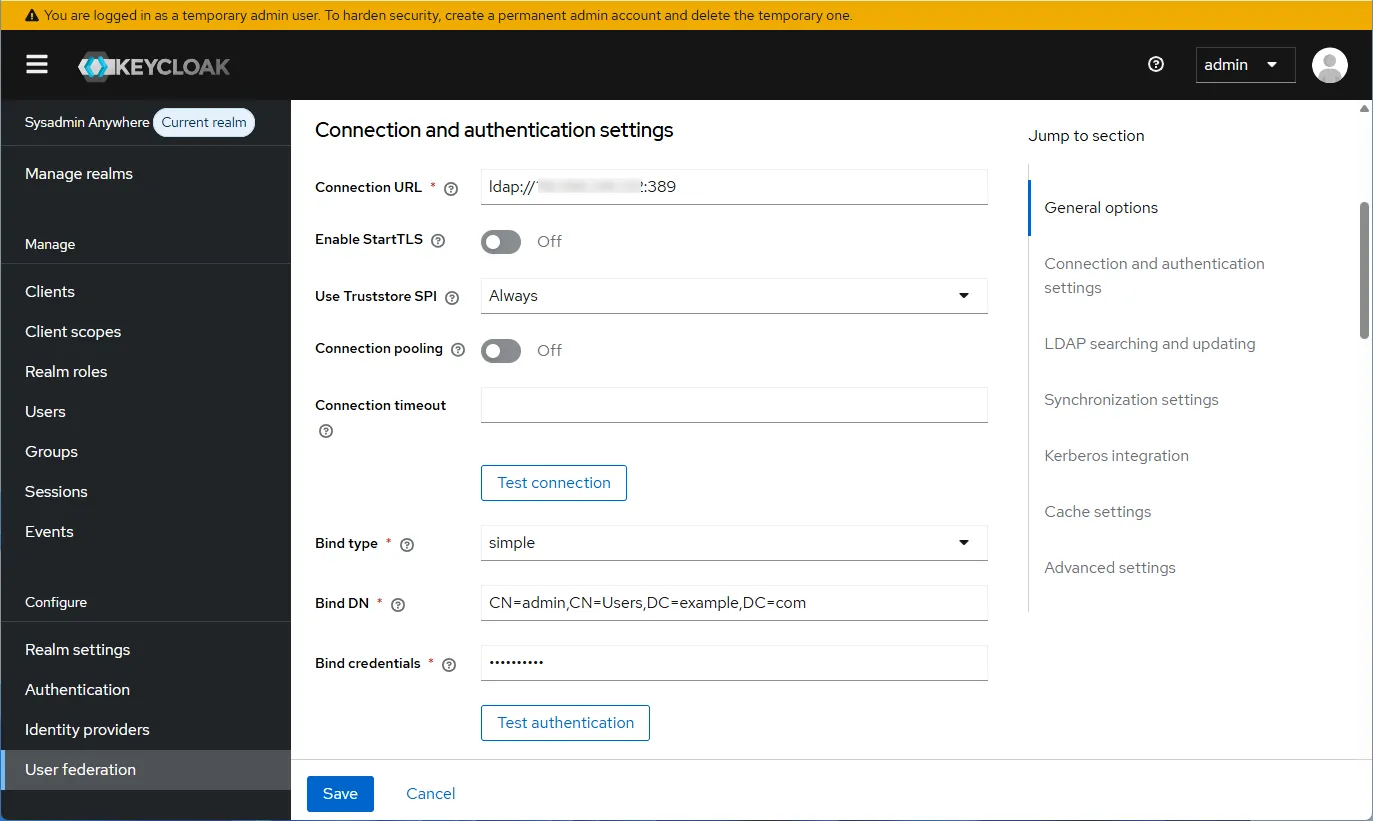
- Configure the “Connection and authentication settings” section. Fill in the “Connection URL” and click “Test connection”. If a message about successful connection appears, continue the configuration. Click “Test authentication” to verify authentication.
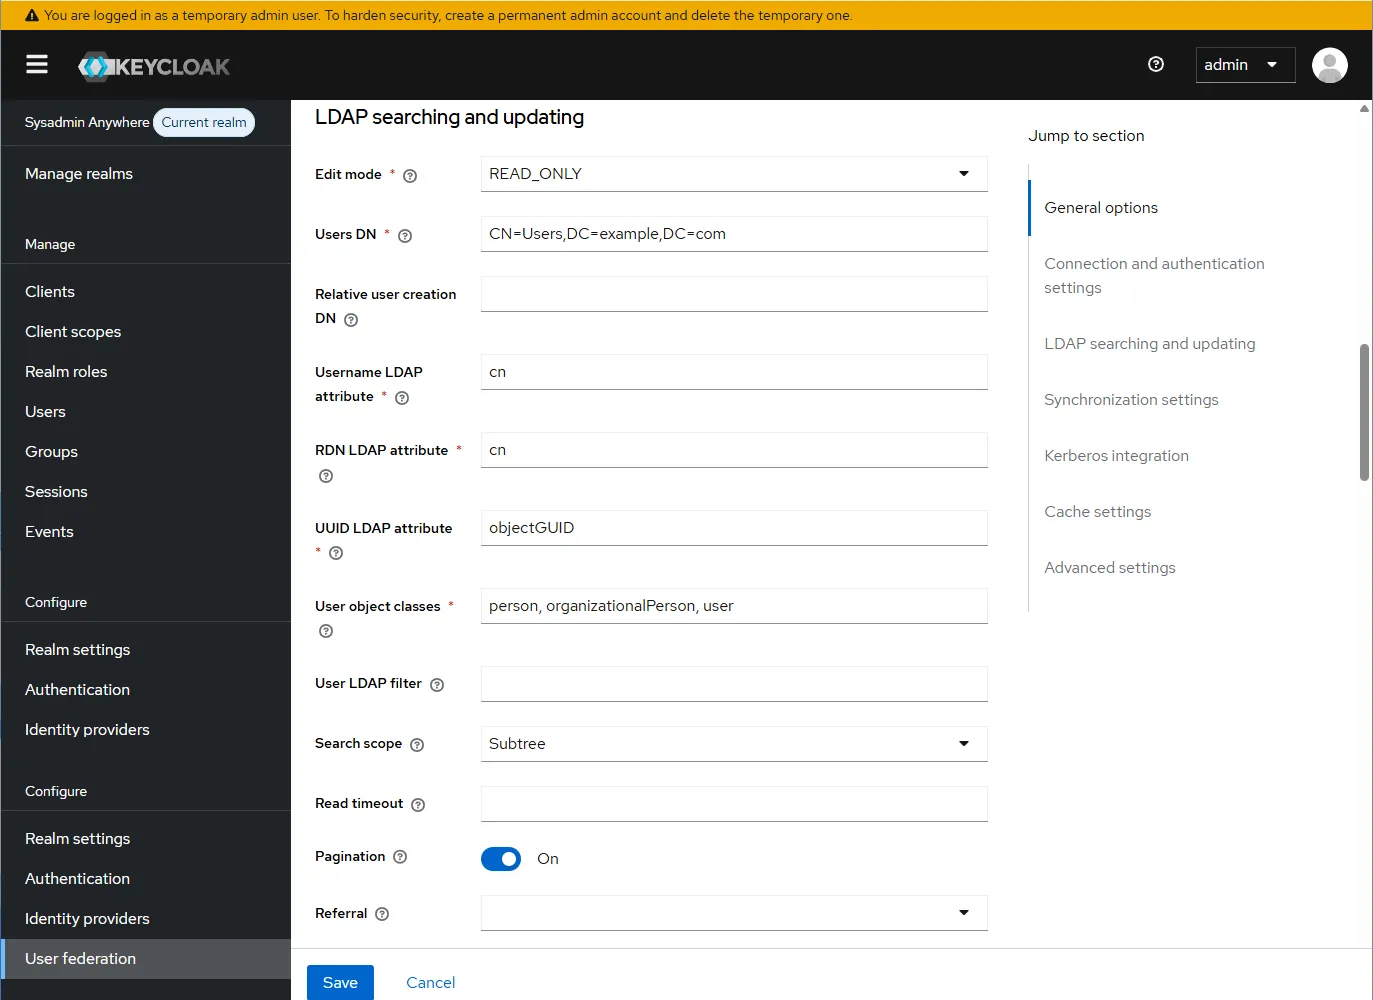
- Configure the “LDAP searching and updating” section.
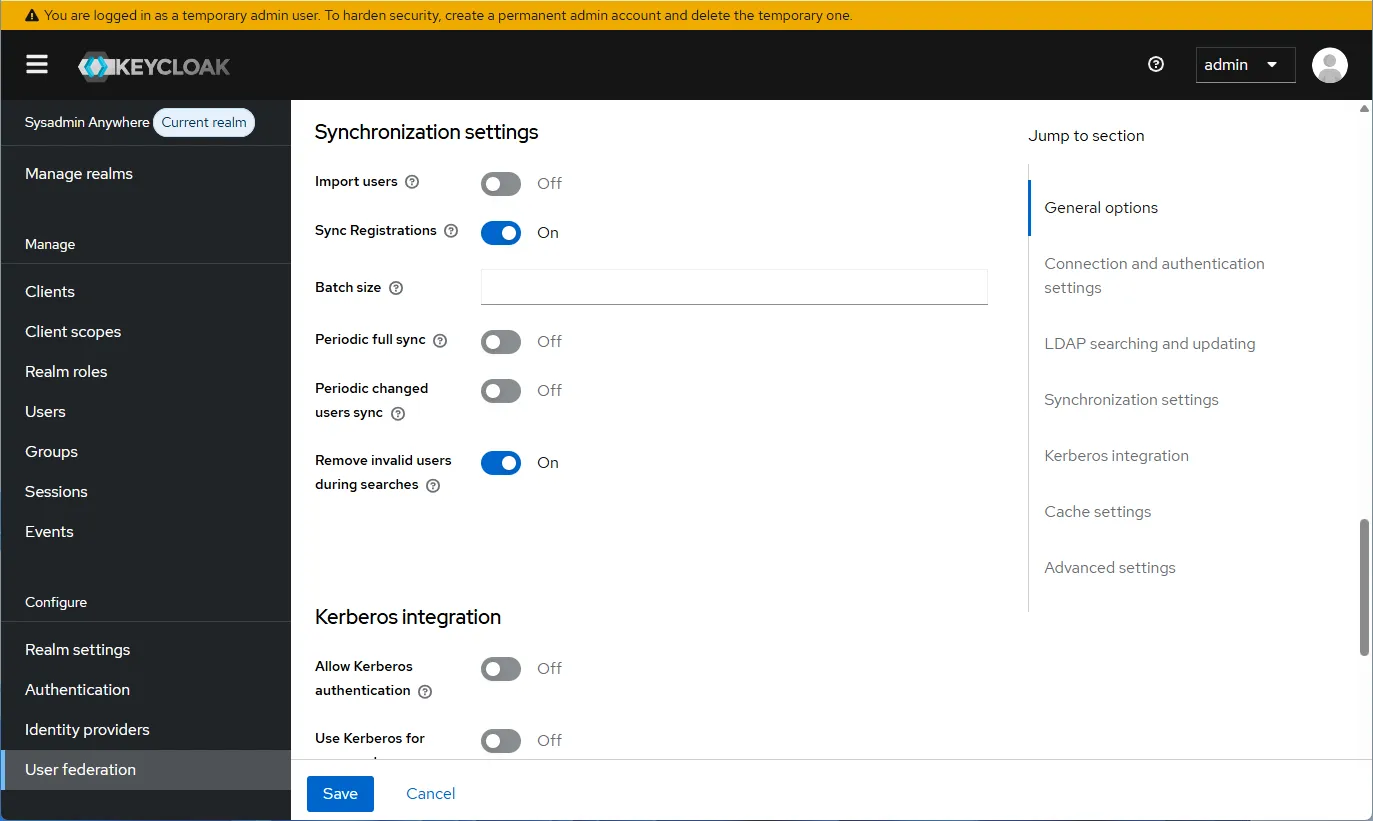
- Next, configure “Synchronization settings”. If not needed, disable “Import users”.
-
Click “Save”.
-
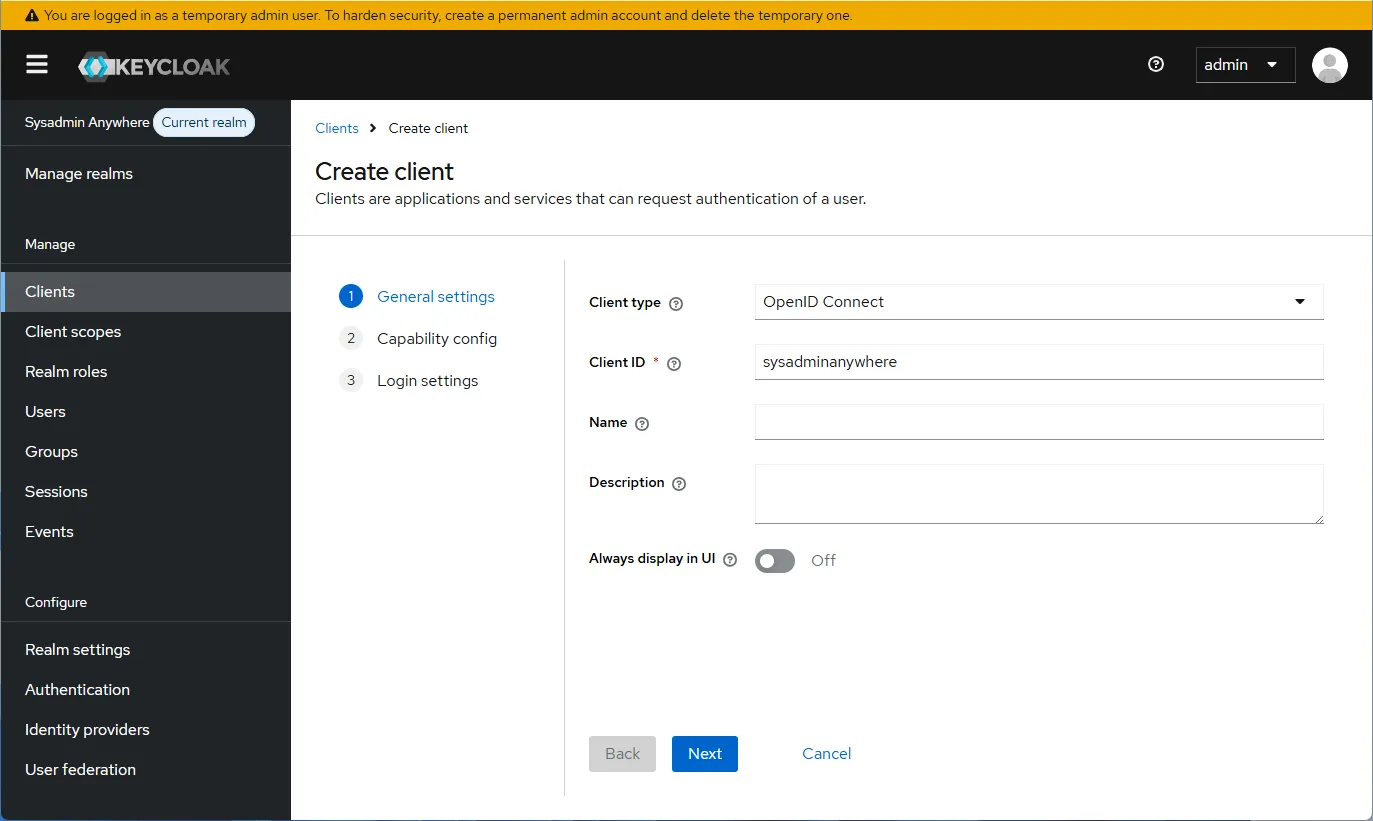
Configure a client. Select “Clients” and click “Create client”. Enter the “Client ID”, for example, “sysadminanywhere”. Click “Next”. Then “Save”.
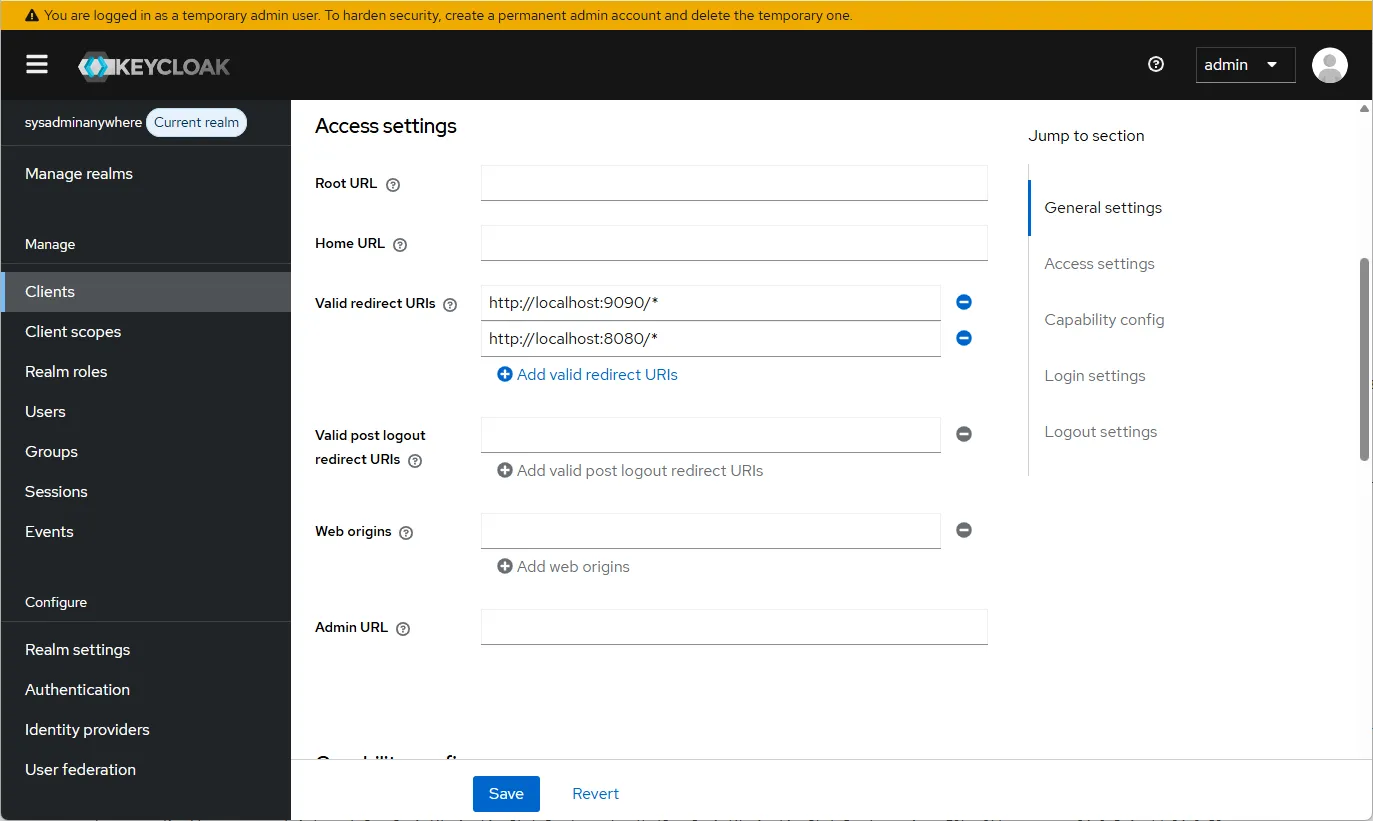
- Go to “Clients” and select “sysadminanywhere” (or what was specified earlier). Fill in the “Access settings”.
- Next, go to the “Capability config” section and click “Save”.

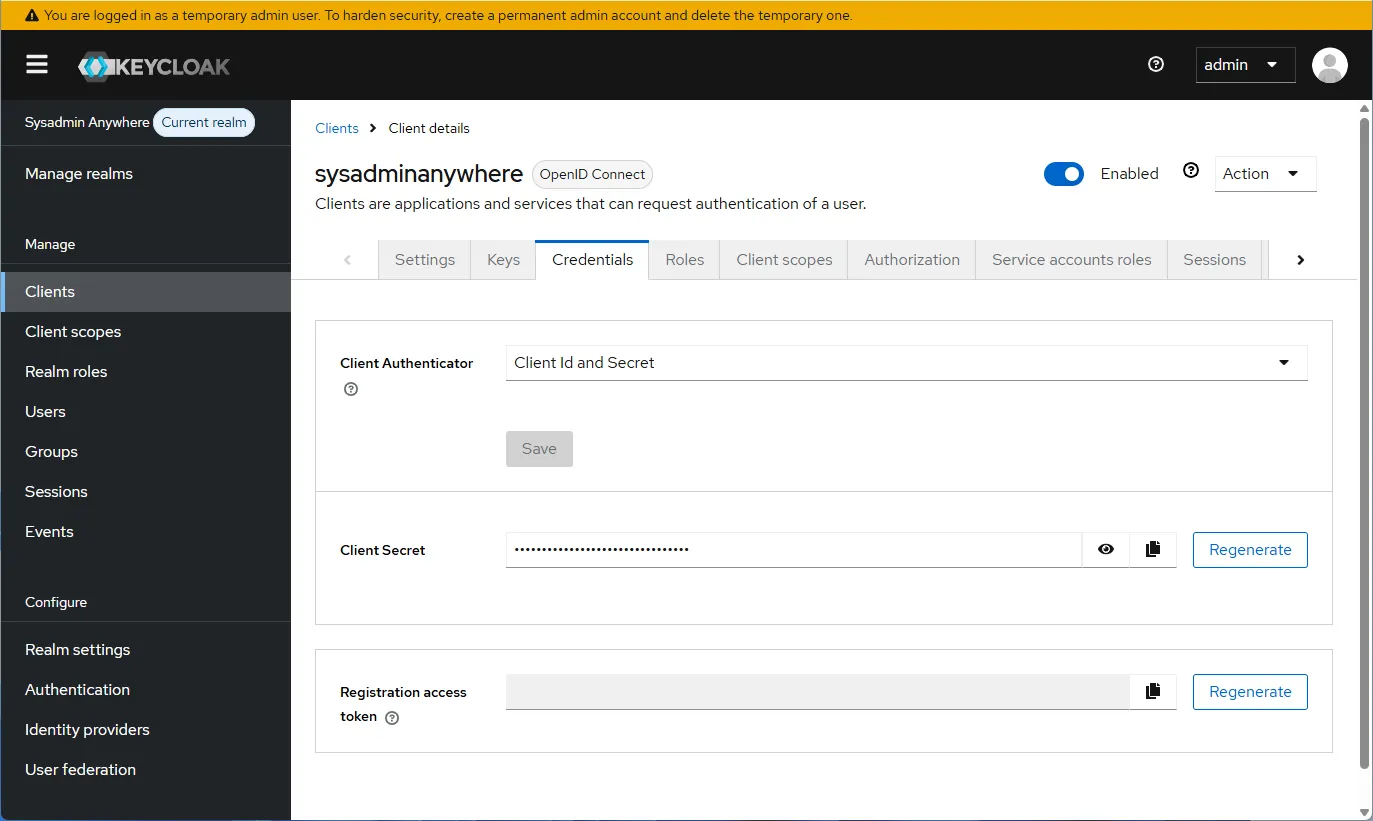
- Next, click the “Credentials” tab in the client’s properties and copy the “Client Secret” into the KEYCLOAK_CLIENT_SECRET environment variable.
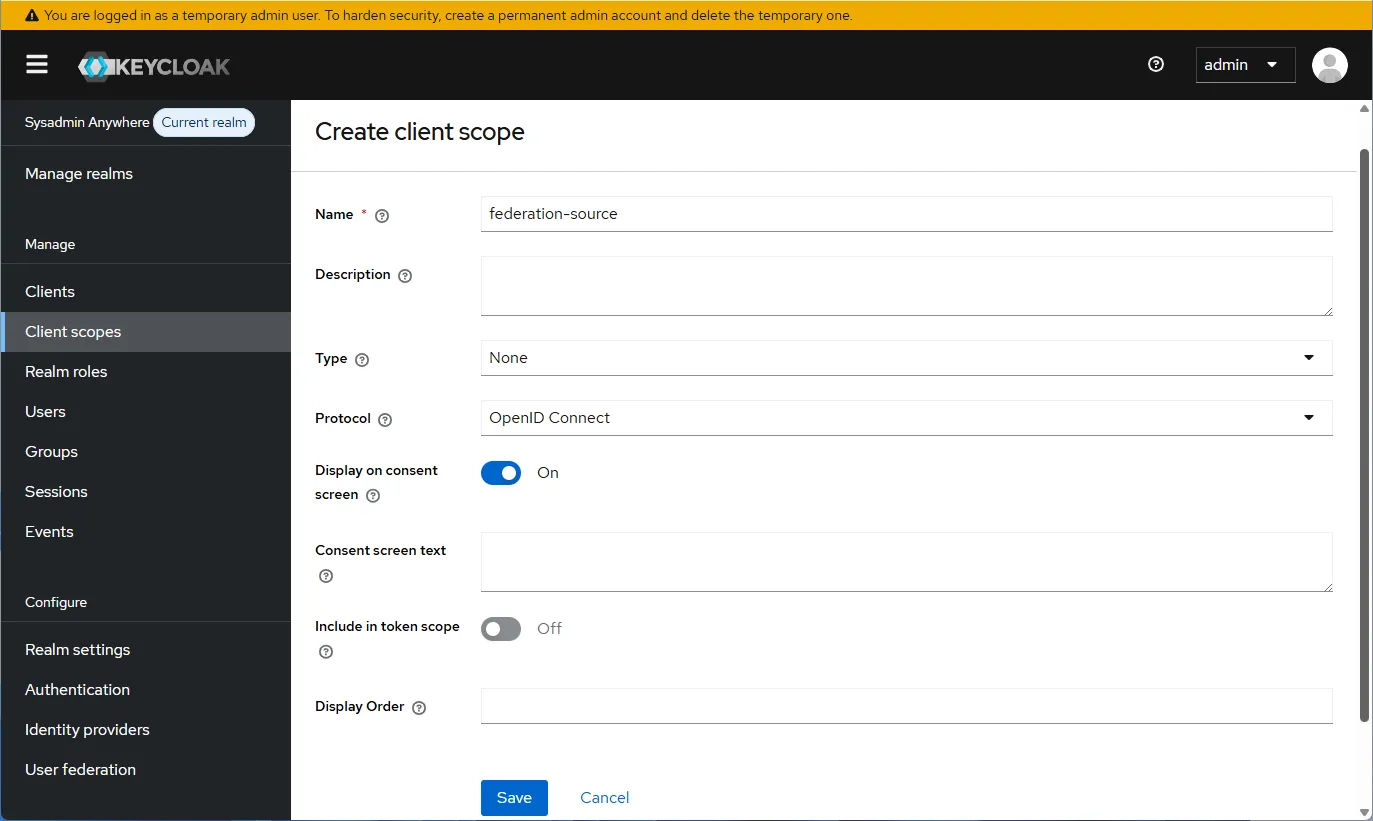
- Go to “Client scopes” and click “Create client scope”. Fill in the “Name” field and click “Save”.
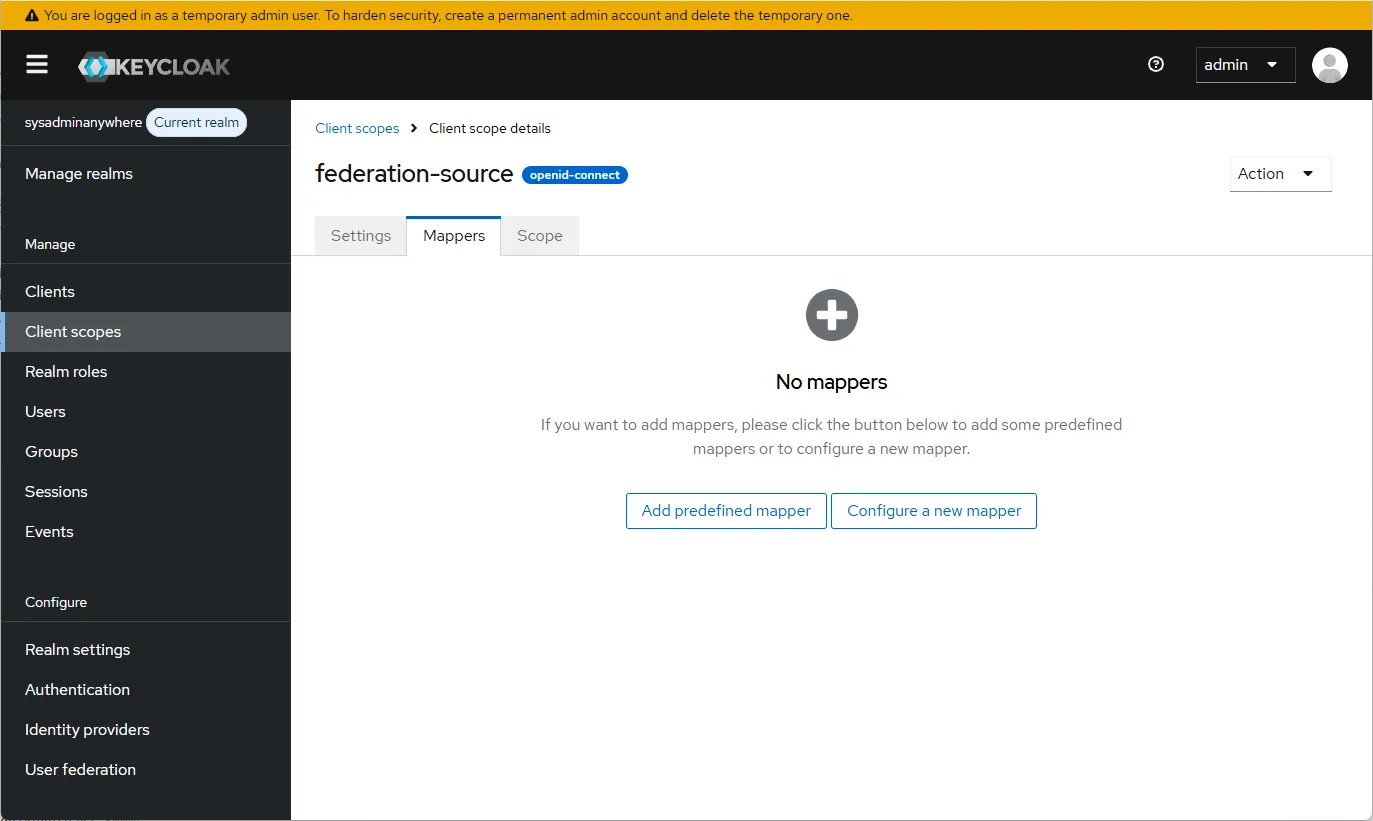
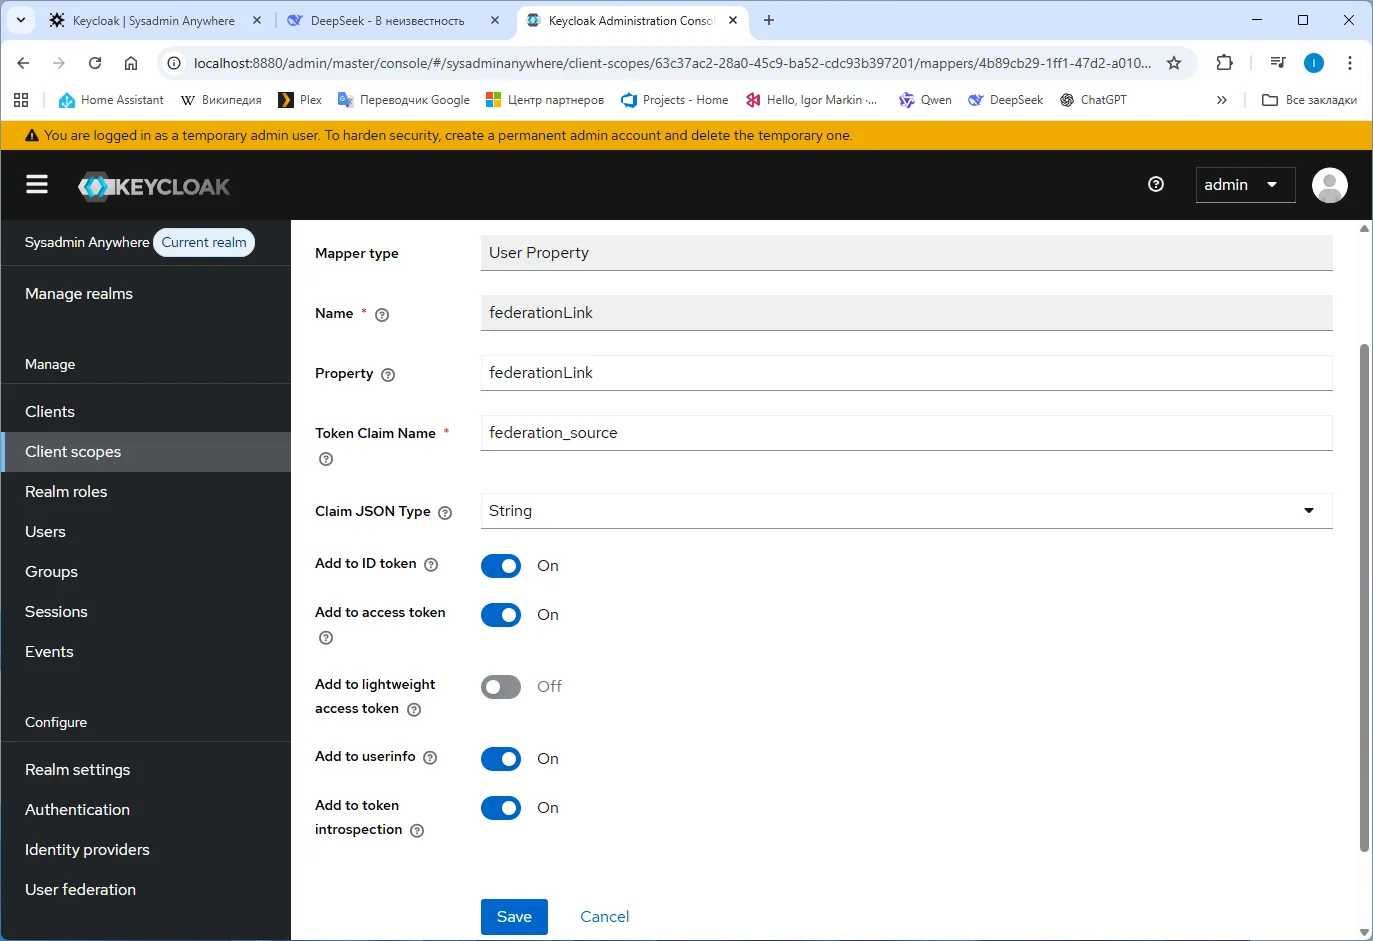
- Select our “Client scope”, click the “Mappers” tab, and then click “Configure a new mapper”.
- Select “User Property”.
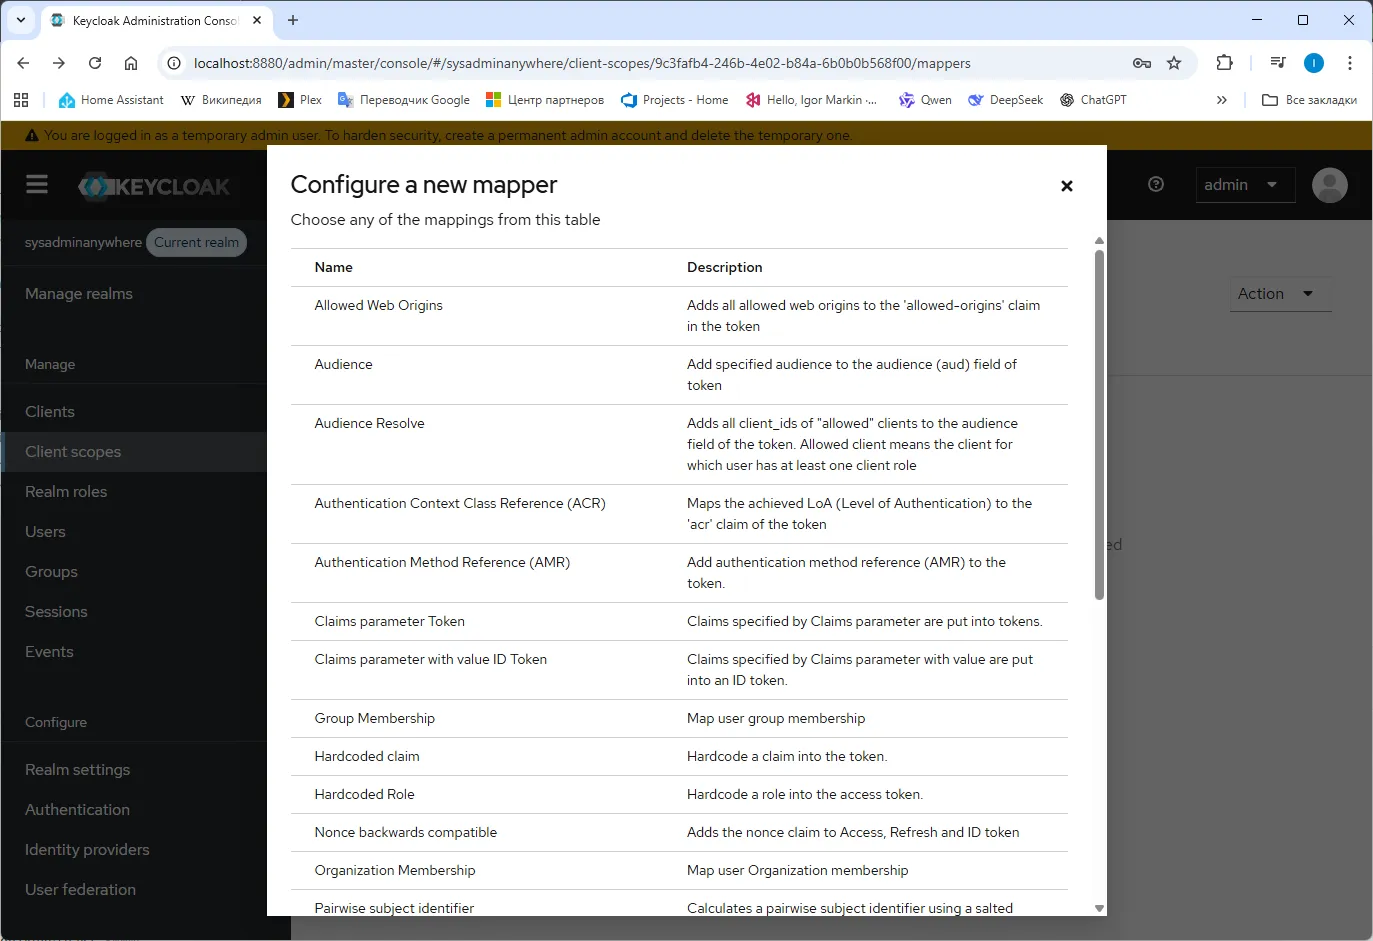
- Add federationLink…
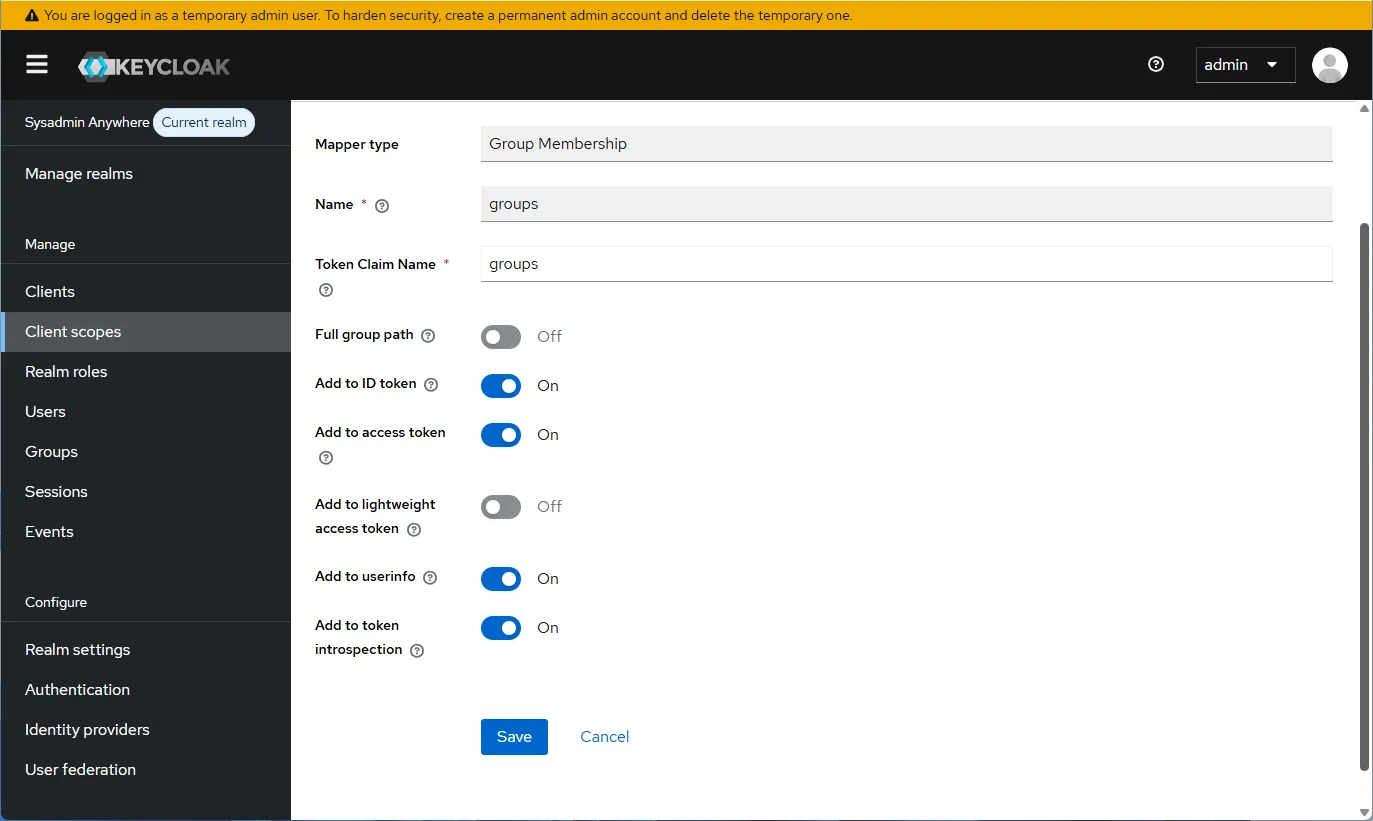
- Repeat for groups, selecting “Group Membership”.
- Add to the hosts file:
127.0.0.1 keycloak- Everything is ready for domain authorization.